Woocommerce
Cum să încorporezi un chatbot pe site-ul tău WordPress
Pentru a adăuga un chatbot pe site-ul tău WordPress sau în magazinul WooCommerce, începe prin a-ți crea chatbot-ul Onchat. Dacă nu ai încă un cont, te poți înregistra pentru un cont gratuit Onchat. Dacă ai nevoie de ajutor pentru crearea chatbot-ului, consultă acest ghid detaliat.
Instalează plugin-ul Onchat pe site-ul tău WordPress.
Mai întâi, descarcă extensia Onchat de aici. Pentru a adăuga plugin-ul Onchat în WordPress, urmează acești pași:
1. În bara laterală din stânga a panoului de administrare al WordPress-ului, dă clic pe „Plugin-uri”.

2. Dă clic pe „Adaugă un plugin nou” în bara laterală din stânga sau în partea de sus a paginii.

3. În bara de căutare, tastează „Onchat” pentru a găsi plugin-ul. Găsește plugin-ul WordPress Onchat, dă clic pe „Instalează acum”, apoi pe „Activează”.

4. În bara laterală din stânga, dă clic pe „Setări”, caută „Onchat”, dă clic pe el, adaugă ID-ul chatbot-ului și apasă „Salvează modificările”.

Cum să găsești ID-ul chatbot-ului tău
Pentru a găsi ID-ul chatbot-ului tău, autentifică-te în tabloul de bord Onchat și navighează la "Pachetul meu". Aici, poți găsi detalii despre pachetul tău OnChat.ai și ID-ul chatbot-ului tău. Copiază ID-ul și lipește-l în setările plugin-ului WordPress.

Activează chatbot-ul pentru a răspunde la întrebări legate de comenzi și să recomande produse
Chatbotul tău poate răspunde la întrebări legate de comenzi, cum ar fi starea plății, starea comenzii sau starea expedierii. Pentru a activa această funcționalitate, urmează următorii pași.
1. Apasă pe meniul "Magazin online" din tabloul de bord Onchat, găsește opțiunea WooCommerce și apasă butonul "Conectare".

2. Adaugă cheia de consumator a magazinului tău WooCommerce, secretul de consumator și URL-ul magazinului tău.

Făcând acest lucru, asistentul tău virtual va fi pregătit să gestioneze întrebările legate de comenzi.
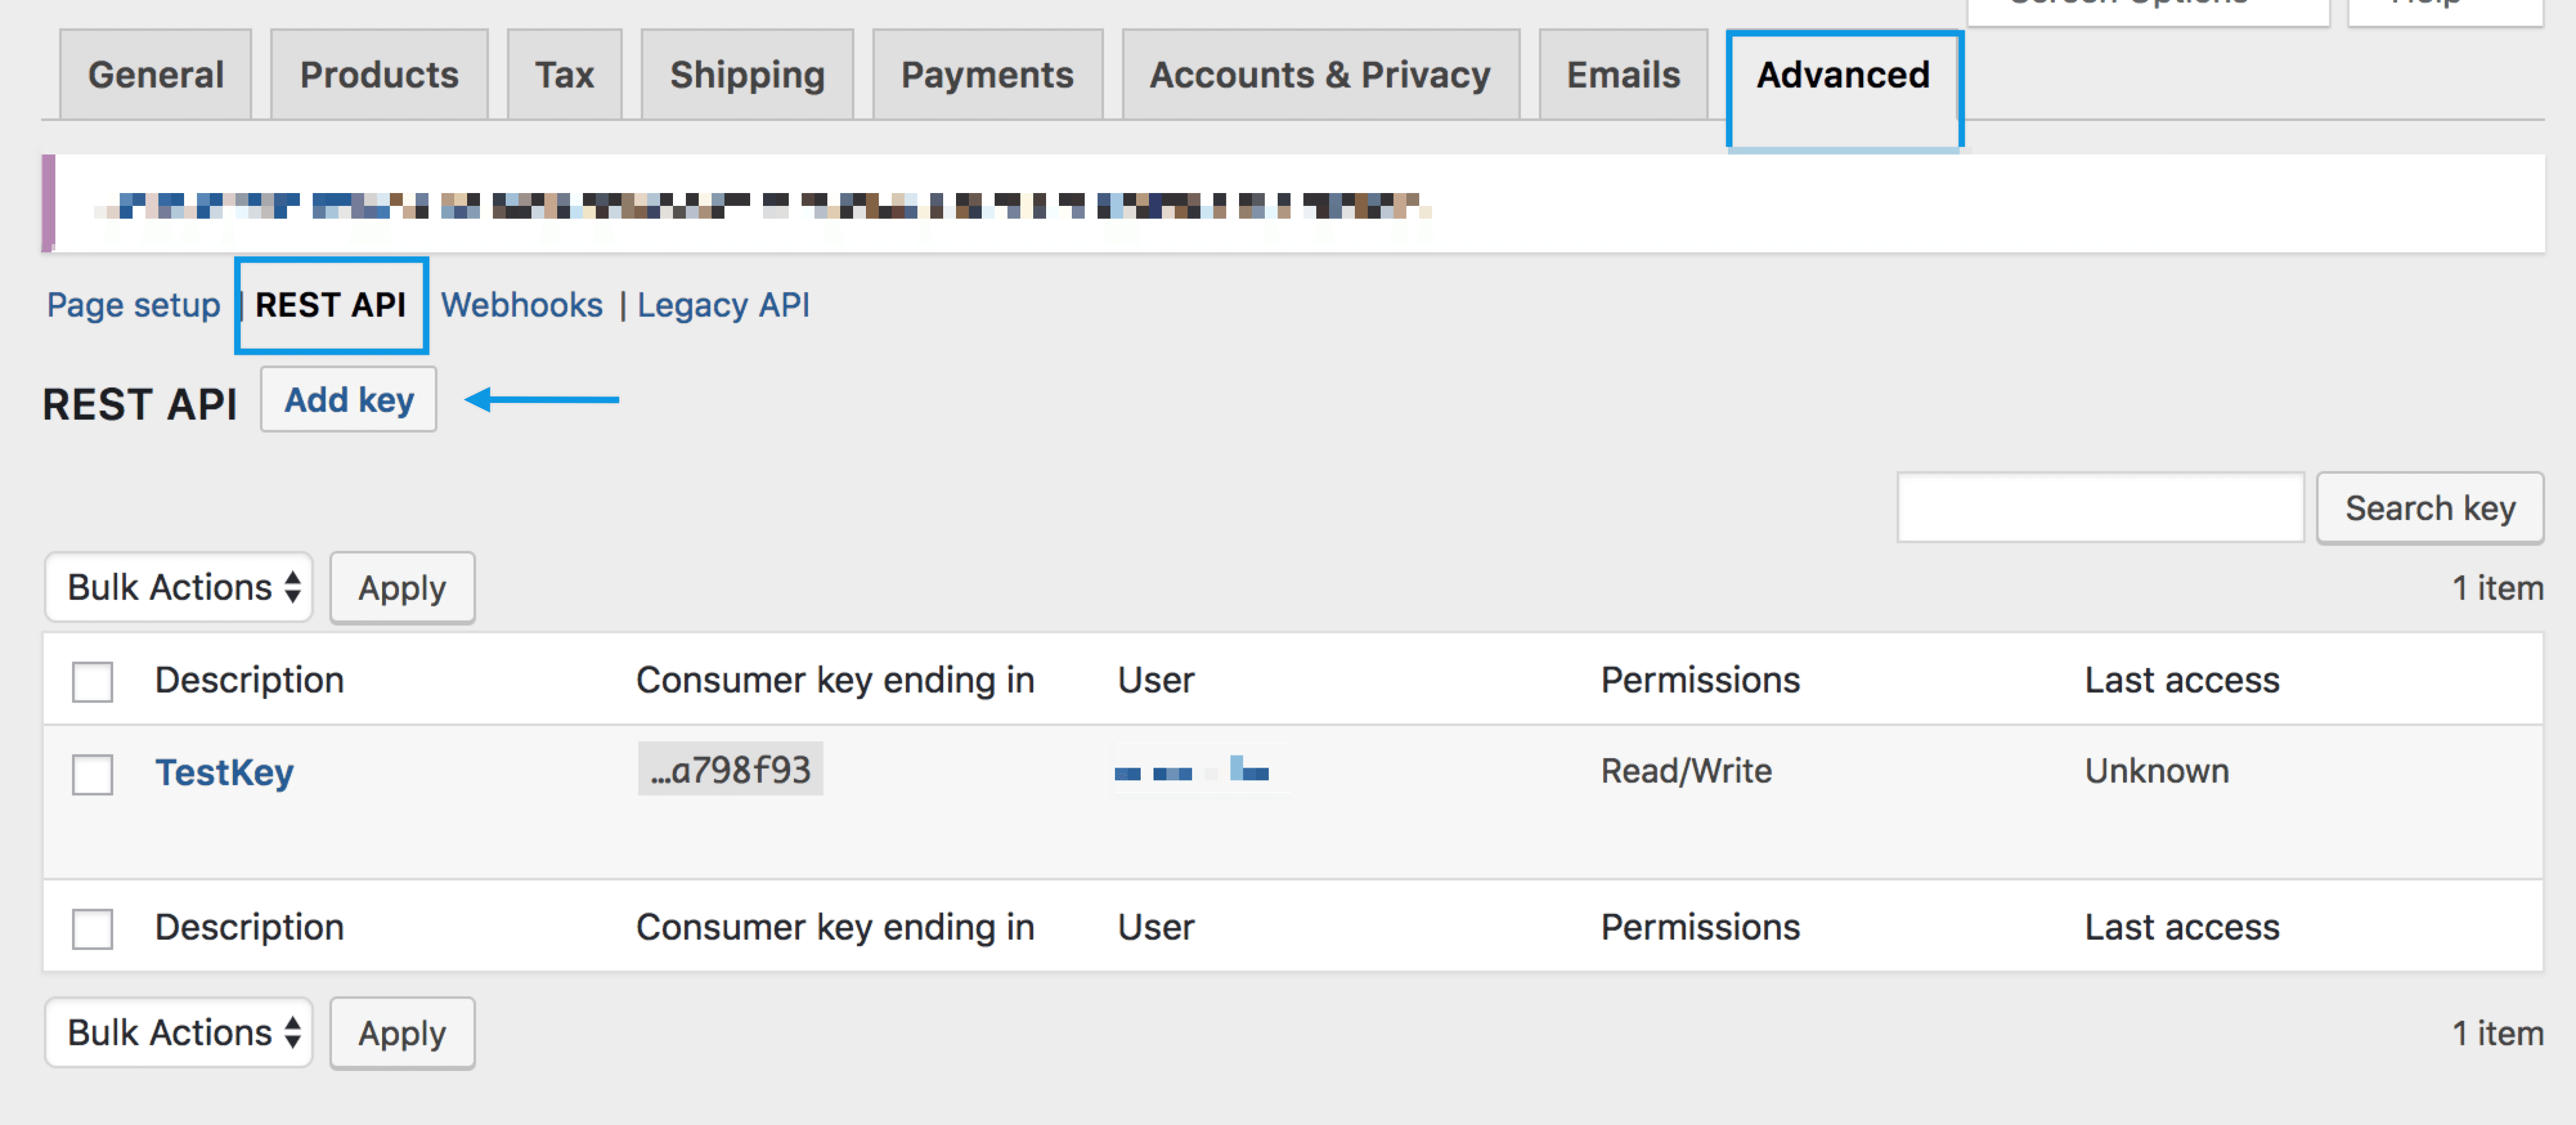
Unde să găsești cheia de consumator și secretul de consumator în WooCommerce
Pentru a crea sau gestiona chei pentru un utilizator specific WordPress, urmează acești pași:
1. Mergi la WooCommerce > Setări > Avansat > REST API în panoul din stânga al WordPress-ului și selectează Adaugă Cheie.
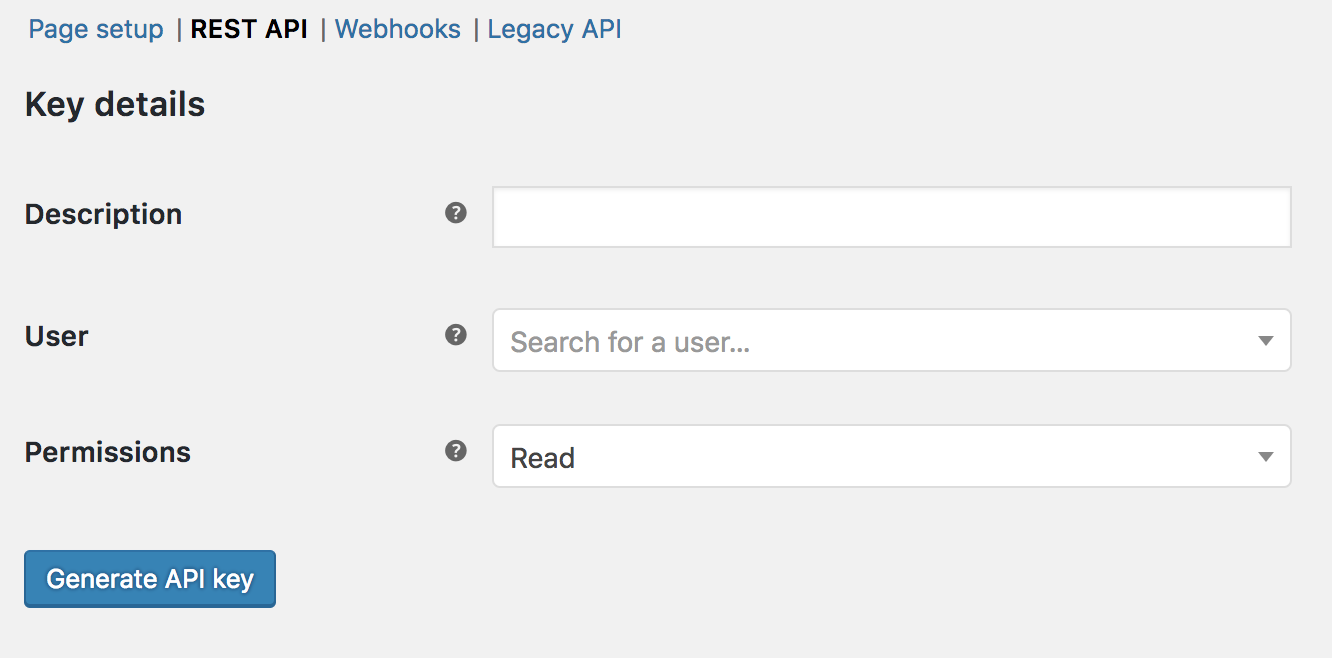
2. Veți fi redirecționat către ecranul Detalii cheie unde trebuie să adăugați o descriere, să selectați utilizatorul pentru care doriți să generați o cheie, să alegeți nivelul de acces Citire/Scriere pentru cheia API și să dați clic pe Generare cheie API.
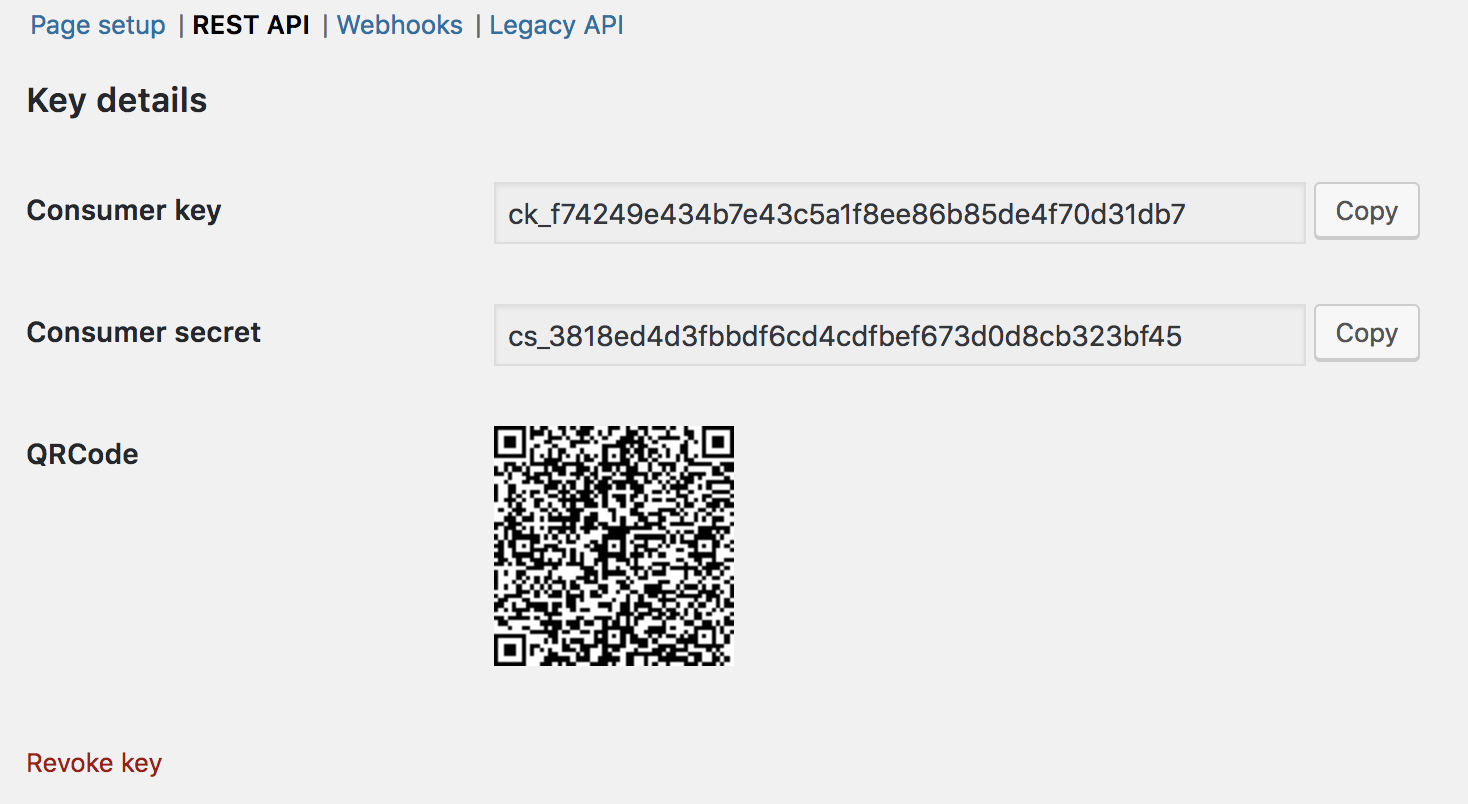
3. Odată ce cheile au fost generate, ar trebui să vezi atât Cheia de Consumator (Consumer Key), cât și Cheia Secretă de Consumator (Consumer Secret) afișate.
Înapoi

Take your business to the next level
Effortlessly build your custom AI agent in minutes without coding, and watch it adapt and improve using your data.


